Sunday, 22 December 2013

Loose ends

Not until we are lost do we begin to understand ourselves.
Henry David Thoreau

Ah yes, I have hundreds of loose ends. I have started documenting all of the little odd jobs that need to be finished. My memory is getting a bit dodgy so a written record can only help.


Despite remakes of my new control cables I managed to get the measurements wrong again, if only by a smidgen. So the end of the accelerator cable was refinished with a small plate of sheet metal and some molten solder. It was all expertly rolled around the end of the cable and fitted. It's not particularly pretty but it works and should be good for years to come. Good stuff.

Next task was the handbrake cables. Also remade, they are unfortunately about 2.5cm (1 inch) too long for comfortable adjustment. We made up some simple spacers by drilling holes through the length of some 12mm square steel bar. We then fitted them as spacers beneath beneath the front adjusters at the base of the handbrake lever. Another job has been jobbed!

Next up was the rear brake adjustment. This was relatively straight-forward and was managed expertly by Marius in a few minutes.


We then dug out the massive 46mm socket and prepared to tighten up the mighty castle nuts on the rear hubs. After application of generous gobs of copper compound we stepped on the newly adjusted brakes, added a long extension bar to the power-bar on the socket wrench and heaved away. The appliance of science! Massive leverage in the form of a one-metre extension combined with the gravitational force of a 120kg neighbour and it's tighter than an elephant's girdle. Finished off by popping in a couple of brand-new split pins (a free gift from the nice people at the Yellow Paint Store, thanks guys). More good stuff!


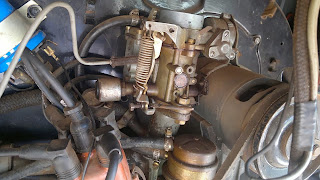
While fiddling about in the engine bay we noticed that the breather pipe connecting the air-filter to the carburettor has split again. (see Clean Air). I chopped it into manageable pieces and trimmed off some excess rubber.


I have bought a bit of clever-bendy-stretchy-wonky pipe from the turbo guys up the road and attempted to fix it again. I'll refit it next week and see if it's going to work.

Right that's about that for now. Thanks for sticking with me so far. I wish everybody a safe, happy, loving and peaceful festive season, cheers for now :)


Thanks for stopping by
CooP
Wednesday, 11 December 2013

Settling In

Travel is fatal to prejudice, bigotry, and narrow-mindedness.
Mark Twain

I've completed the move to my new home, much smaller and neater than the old one. And so has the Marigold Project. Thanks to my super-accommodating neighbour I have managed to squeeze her into a luxurious undercover spot that is warm, dry, windproof and includes another VW granny as company!


It's a tight fit - the standard garage is 6 metres long and Marigold is now 5.8 without the bumpers or the front spare wheel fitted.

I hope to re-commence work on the project shortly - visit again for updates!

Thanks for stopping by
CooP

Saturday, 26 October 2013

On The Move

The world is a book and those who do not travel read only one page.
St. Augustine

I was really worked up for the big move today, exciting stuff for an old fart like me. I got the ever-friendly and helpful neighbour Marius along to help with some diesel pulling power. And he brought his dad-in-law Pieter for support, thanks to you both for the help.

When I originally fitted the poles to the car port I managed to hit an underground pipe so I moved the centre pole a little further to the right than I originally intended. I calculated that Marigold should just be able to squeeze out. WRONG!


I only miscalculated by about 2 centimetres, so close but so useless. After mucking about with jacks and ramps for half an hour we just decided to lop the pole off at the bottom and bend it out of the way. It's just going to be quicker and easier to weld it back later.


And she's out! Away from the back and into the front garden. For the first time ever I can take a photograph of the full left-hand side.

And we stumble straight into our next problem - the grass is sodden and the ground beneath is slick, soggy clay. Great if we were re-enacting "Ghost" but hopeless for towing a tonne and half of dead weight up a 30 degree slope. Despite the awesome turbo-diesel power of the Isuzu and letting the tyres way down we only managed to achieve a lot of noise and splattered, muddy mess. We just couldn't get over the ridge at the gate and all we managed to do was create violent wheelspin and flying lumps of garden. Think, think, think...

Aha, Marius just remembered that he has an interesting souvenir left-over from his 4x4 days - a rather oddly named thing called a "snatch strap". Stop drooling at the back, it's not what you think. He joined this fearsome 7 metre long bungee to both vehicles and set off up the hill at full speed. 

In the driving position in Marigold I was not really told what to expect. So it was only when the Isuzu reached the main road and I was airborne like a kite behind it that I realised that the loud "clank" was the sound of both of my eyeballs landing in the same socket after bouncing off the back of my skull. What a fearsome and unexpected launch. Next time I'll be certain to ask more questions before offering to sample any equipment that seems to have been designed by a sadistic bondage expert.


Never mind, despite the extreme lift-off we managed to come down to Earth with a safe landing and well clear of the gates and the muddy ditch. The contents of the bus had taken a step towards the rear tailgate, as had the fibre-glass roof. (See the pic above and compare to the previous pic.) But no permanent damage has ensued and we're out! Three frustrating hours but I do like a happy ending. A safe and gentle tow around the corner to Marius' house where he has kindly offered storage space for the next period.

What a thrill to be behind the wheel and actually steering the project on a real road. Ok we were taking it really easy - slower than a tortoise off a lettuce - but still, very exciting to be using steering and brakes for the first time in this four-and-a-half-year project.

To Marius and his family, thanks again for all the help mate! Much obliged.


And my newly completed car-port stands forlorn and empty. It's a bit sad that I managed to get my working conditions so right, just in time to move out!

As usual, click on the images for a slightly larger version.


Thanks for stopping by
CooP

Wednesday, 23 October 2013

Down To Earth

We make ourselves rich by making our wants few.
Henry Thoreau

Well it took a bit of effort and a few short-cuts but Marigold is back on all fours and crouched for the imminent move. The tyres are bit soft and the brakes are bit rusty-dusty but she'll be towed away this weekend to her temporary residence nearby. I'll give you an update shortly when we hit the road!


Thanks for stopping by
CooP

Saturday, 28 September 2013

Prepare to Move

Every man can transform the world from one of monotony and drabness to one of excitement and adventure.
Irving Wallace

So it looks like I'm moving house soon. This one is too big and expensive so we'll keep it but let it out, hopefully to a family that will appreciate all the space. This means that I am now in a hurry to get the Project back on four wheels again so that she can be moved.


The gear stick and linkages have now all been greased up and re-fitted, all seems to be working fine still and all the gears are there where I left them! The seats are in a horrid state but they will be cleaned up and re-covered before the final fitting. This bus was designed to have a "walk-through" between the seats to allow access from the cab to the rear. The passenger seat is a bench seat though, which covers that gap. The special brackets that support the passenger bench seat across that gap were thankfully made to be used on either right-hand or left-hand drive with a few simple adjustments. Adjustments made and the seats were made to fit and work correctly in their new positions, opposite to their previous left-hand drive configuration.

All of the new cables just need final fitting and adjustment and they are ready to go. I still need to source the sleeve for the accelerator cable but it'll work as-is in a pinch.

The entire project is looking dirty, dusty, scruffy and a general mess at the moment. Not to worry, we'll cover all of this with a few coats of paint in the future. It gets worse before it gets better, so I'm told.


The galvanised metal car-port roof has finally been finished off and is looking pretty good, pat on the back for me as I did almost every part of it completely alone. Pity I'm moving now but I expect that I'll be back to enjoy it in the years to come.


Thanks for stopping by
CooP

Saturday, 21 September 2013

Under Control

Life is a fatal adventure. It can only have one end. So why not make it as far-ranging and free as possible?
Alexander Eliot

A few routing issues but nothing too tricky and I can announce that the control cables are fitted! Accelerator, clutch and both handbrake cables have been patiently guided into their respective tubes, pipes, slots and holes.


Pictured above is the Bowden Tube, a flexible sleeve through which the clutch cable is routed. It is designed to be slightly bent to help absorb clutch shudder and pedal feedback. It was pretty gunky with over 40 years' road muck but I cleaned it up and removed the worst of it. It was a really tight fit to get the threaded end of the cable to pass through but after some fiddling and the obligatory four-lettered encouragements we managed to succeed.

The accelerator cable seems to be missing a sleeved section where it runs beneath the fuel tank. I can't remember this part but it surely must have existed but there is contact now with the actual cable and the fuel pipe/filter assembly. Will look into it and report back.


The handbrake cables required longer sleeved sections to be custom-made. This is because they could no longer be routed through their original paths owing to the new chassis beams that were added.


In order for them to be mounted correctly we had to weld up some new brackets and fit them to the chassis cross-member. This was done without too much fuss and the handbrake cables are now fitted, seated and adjusted!


I managed during the week to also complete the roof over the project and then paint the last two coats on the newly-raised wall. Slowly but steadily we are making progress, and getting it all under cover, and under control!


Once again a great big THANK YOU to my friendly neighbour who has been putting in double shifts of late in order to help me speed up the whole project. Welder, fabricator, electrician, moulder, sander, motivator, general genius. Without his help a lot of this would still be just an idle daydream, much obliged mate.


Thanks for stopping by
CooP

Friday, 6 September 2013

Ravelled

The test of an adventure is that when you're in the middle of it, you say to yourself, "Oh, now I've got myself into an awful mess. I wish I were sitting quietly at home." And the sign that something's wrong with you is when you sit quietly at home wishing you were out having lots of adventure.
Thornton

So... I am pleased to report that the cable expert was a bit more impressed with the second attempt of mine to present my cables to him for extending. Because of my doubts about the accuracy of my measurements I requested him to create the new cables but only to fit one of the end-fittings to each of them. I also requested that he leave an additional 200mm on the cable length to allow for trimming. In that way I thought that I could fit them into their exact positions and mark the precise point where each of the remaining end fittings should be attached. Clever hey?

This is where I discovered that the measuring had not gone as well as hoped. Both of the handbrake cables were somehow way too short! 1.3 metres of gaping space between the tail end of each handbrake cable and the back wheels. That's around four feet in the old money, oh dear, oh dear. I can almost hear my late step-father's mocking voice: "Coop, this time you've made a monumental, right royal, five-star, flag-waving, ocean-going cock-up!"


Ah well, the other two were almost perfect, a small amount to be trimmed and they'll be ready for use. I packaged everything up carefully again with the updated, accurate measurements and schlepped it off this morning to the cable maker in Randburg.

He was good enough to recreate the two new handbrake cables in full and add the remaining fittings to the others while I waited. It all ended up costing a bunch more than I had budgeted for but it's my own fault - for the sake of my sloppy measurements the two handbrake cables had to be completely remade.


At least they are done now, properly made, custom cables that should last for the life of this bus. They look perfectly good and seem to be very well made. Wherever possible the tatty old fittings have been re-used - cleaned and polished up to look like new parts.

I must extend a special thank-you to Martin Peach for his efforts, his company is called Cable Maker and you can reach him at 082 492 7794 or (011) 787-2995. For very professional manufacturing of any type of cables, window winders etc. I recommend him.


Thanks for stopping by
CooP

Tuesday, 27 August 2013

Unravelled

Security is mostly a superstition. It does not exist in nature, nor do the children of men as a whole experience it . Avoiding danger is not safer in the long run than outright exposure. Life is either a daring adventure, or nothing.
Helen Keller

The cable expert wasn't impressed much by my rat's nest of tangled, greasy, rusted, frayed, dirty cables (pictured in last week's post). Wonder why...


I've cleaned them up, labelled them, bagged them and made neat little instructional pages - with diagrammes! I've sketched each one and marked out all of the fittings, dimensions and instructions. The cable guy had better be impressed with this lot. Unfortunately my borrowed car blew up on the freeway today and I only got home long after dark so I'll drop them off at the cable maker's tomorrow.


Thanks for stopping by
CooP

Thursday, 22 August 2013

Bleed Bleed Bleed!

It is preoccupation with possessions, more than anything else, that prevents us from living freely and nobly.
Bertrand Russell

I've been fiddling and struggling with the hydraulic brakes for weeks now, it's almost impossible to do alone with basic tools and an almost complete lack of knowledge :(

Thankfully my friendly and more clued-up neighbour came over with  some good ideas, strong muscles and a smartphone with a smarter father on the line. We bled the brakes for ages but something didn't feel right and it didn't work as expected. We took off the bleed nipples at each hub in order to check them and found them to be rather gunked up with oil and road filth. A good cleaning soon put them right and we managed to bleed all of the the air out of the system.

"Pump... release... pump... release... pump... release..." My neighbours must be wondering what we get up to in the garden on a Wednesday evening, heh heh.


With some welcome advice over the telephone on drum brake adjustment from aforementioned father we got the settings all correct and the system seems to be maintaining pressure, the brakes are working at all four corners and the pedal "feel" is consistent and correct. Yay! Thanks mate once again for the help.

We have collected, connected and measured all of the random bits of cut cables that have littered the workspace for the past few years. Clutch, accelerator and a pair of hand-brake cables will all have to be carefully measured, matched and made to fit the new, longer chassis.


My notes probably only make sense to me but I'll take the mess of broken and cut cable parts to a specialist in Randburg on Friday and find out if they can make head or tail of it all. And join head to tail to make up the new, extended cables!


Looks like a rat's nest, if the rat is a bit nuts.


Thanks for stopping by
CooP

Thursday, 18 July 2013

Meet You at the Reservoir

He who would travel happily must travel light.
Antoine de St. Exupery

Making slow progress this week. Clumsy old me managed to poke my thumb through the side of the original brake fluid reservoir from Marigold. It was fitted behind the seat and had become very brittle with age and exposure.


It shattered (unexpectedly, and startled the cr@p out of me) while I was trying to fit it beneath the dash. The one that was originally in the white Kombi was melted beyond use by the fire that caused so much other damage to the front end.


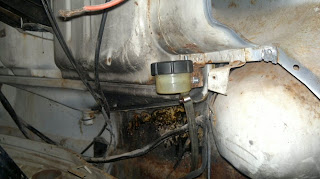
I found a suitable substitute in my collection of motorbike spares - this reservoir pictured above is from a 1982 Suzuki GS1000. It is made of thicker plastic than the original VW part and is still strong and rigid. I made a simple bracket to fit it into position and we topped it up with the correct brake fluid. We started to bleed the brakes but it was getting late so we called it a night. Slow progress but any step forward is a step in the right direction, I suppose.


Thanks for stopping by
CooP

Saturday, 13 July 2013

Brakes!

We are always getting ready to live but never living.
Ralph Waldo Emerson

As mentioned in my previous post, thanks to my having become half a century old, the budget for the project has grown slightly and I could spend a bit on some bits.


It's hard to see in this pic but I had an extra-length section of hydraulic brake pipe made up to fit the extended distance from front to back. It has all the bends in the right places and brand new fittings and connectors all over. (It's the long, skinny, metallic thing on the floor there.) I was visiting the Midas spares shop in Witpoortjie to look for rubber grommets** and saw the hydraulic specialists next door. Super quick and reasonable in the pricing department too, they made up the length while I waited. Excellent service!


 It took a fair amount of jiggling and fiddling but I managed to wrangle the new length of pipe into place between all the existing pipes and cables. I have attached short pieces of clear plastic tube around the length of it to protect it where it comes into contact with other metal parts. I have also succeeded in getting it to pass through the inside of the new chassis beam so it shall be well protected from both weather and physical damage. Nice job. Sorry for the poor pic of only the one end but it's tough to get a decent snap while lying under the project with the old camera.

I discovered (by accidentally shattering it with my clumsy fist!) that the storage container for the brake fluid has become brittle and perished . I'll use one of my old Suzuki motorbike containers, they are still in good condition and I do have a spare. I'll just have to modify the bracket slightly to make it fit properly.


The plaster has dried out somewhat on the wall that I extended so I managed to prepare it nicely and get a couple of good coats of primer laid on.


The next big challenge is to sort out the mess of old wheels and tyres of different ages and sizes to get a set of four matching rims to fit.

** They don't stock rubber grommets, none of the motor-spares shops seem to do so either. And the staff at all of my local hardware stores just stare blankly at me, even when I show them a sample.


Thanks for stopping by
CooP

Thursday, 30 May 2013

Bits and Bobs

Many people die with their music still in them. Why is this so? Too often it is because they are always getting ready to live. Before they know it, time runs out.
Oliver Wendell Holmes

Bobs what? Dunno really, daft expression. I managed to attack a lot of the small, niggly jobs this week - started some and actually finished some too.


I whipped off the sliding door to reach behind the dents a bit easier. I tapped out the worst of the long dented scratches and sanded off the paint to ready the area for filler. Behind the rivet holes i made up some small glass-fibre patches and fixed them in place with a good gob of resin.


I laid it flat on the picnic table in the garden to blob on some body filler and start the seemingly endless job of sandpapering it to a smooth state. Still lots to do here but at least I've made some progress.


The rear engine cover door had lots of holes drilled in it for the various different registration plates that Marigold has carried over the years.She's had at least one German one, one from Cape Town, an old TJ Johannesburg plate, an old Transvaal plate and a later Gauteng plate. I stripped off the paint from the inside and patched the backs of the holes with small fibre-glass squares and a little resin. After that had cured properly I filled the front side with body filler, sanded it nice and smooth and then slapped on some red oxide primer with an old brush.


As you can see in the photo I have also fitted the nice, shiny exhaust tail-pipes that I bought from the useful (and now sadly defunct) Beetle Beauties a few months ago. I got hold of a couple of super-strong clamps and tightened them really well. I've also glued them in with a glob of GunGum for a real belt and braces measure.


While I was busy with the fibre-glass I also put patches over and under the large hole in the battery tray within the engine compartment. I swept out all of the dust, rust, dead leaves and bugs first. I laid down two good coats of the rust converter liquid above and below and then laid down a good patch on either side of the hole. It's not pretty but it's solid and should last well after a couple of coats of paint.


A recent birthday meant some cash came into the project fund (thanks especially to my Dad and my sis xx). I bought some (surprisingly expensive) wire of differing thicknesses to commence building a new loom to run through the underside of the chassis and spread the good volts around. Gonna need a new battery too, sooner or later, but I'll just keep getting each little bit as I can afford it. Any progress, no matter how small, is still progress and is therefore a Good Thing!

I have also torqued up the bolts on the CV joints to the required 25 foot/pounds. Of course, because nothing ever works properly the first time around, one of them had a rounded off hex hole in the top and needed replacing. I managed to find a near exact replacement at a local store without needing to resort to the expensive dealer option. I ground off the slight excess length and it's just right :)

Also done is the bash plate used for protecting underside of the gearbox from rock damage. I gave it two coats of black enamel paint for extra protection and it's neatly fitted and tightened up nicely with new U-bolts.


Thanks for stopping by
CooP

Tuesday, 21 May 2013

Glassed Up

To change one's life: Start immediately. Do it flamboyantly. No exceptions.
William James

I got the rubber gloves out of storage and had a go at the old fibre-glass patching. After leaving the cab floor to dry and set completely I gave it a bit of hard work with a piece of sandpaper and then dusted off nicely. I have worked once with fibre-glass* before and spent three days itching, stinging and scratching. The tiny little fibres of glass pierce the skin and then stay there, invisible and very irritating. Hence the protective rubber gloves :)


It's pretty easy really, cut pieces of the glass-fibre mat to the required size. Then just add a few drops of catalyst to some of the gooey, translucent resin and stir it up to activate a chemical reaction. This allows the resin to "go off" and set really hard. Too much catalyst and it sets within minutes, too little and it takes days, or never sets at all. I was overcautious and added only half the recommended amount as I wanted plenty of time for my old fingers to work with it. As a result it took over a day to set properly but looks great.

* I believe it's properly called GRP, or Glass Reinforced Plastic


I gave it a quick coat of red oxide primer just to keep the whole area protected and stop any moisture from getting to the recently treated metal areas. I made eight separate patches for all of the different rust-holes that I found in the floor. The largest one behind the accelerator pedal got a double patch - the two layers of matting and the resin combined have made a patch strong enough to support my weight! It's not very well hidden but I'm planning to rubberise and also carpet this area so it's not too important from an aesthetic point of view.


Thanks for stopping by
CooP

Thursday, 9 May 2013

Third Time Lucky

Life is not lost by dying; life is lost minute by minute, day by dragging day, in all the thousand small uncaring ways.
Stephen Vincent Benét

Here we are yet again fitting the engine into place in it's bay. Hopefully the saying proves true - the third time is the charm. The gear linkages are all working correctly now and the gearbox should not need any further work so there shouldn't be any need to take the engine out again.


We fitted all of the correct bolts to the re-greased CV joints and nipped them up tight. They still need to be torqued properly but that is a one-man job that I can do later.

I removed the metal strips from the sliding door by drilling out the rivets and smoothing the protruding heads down with sandpaper. I've removed the plywood panel from the inside of the door, and all of the insulation material so that I can remove the other side of each rivet.


The top one is a support for a shelf made by my dear old Dad. It used to hold cups, glasses, wine boxes etc. The middle one is a support for the original Westfalia table that usually fits to a similar support between the seats inside the bus. The wider, lowest one is to cover up a long dent that was caused at some forgotten moment of miscalculation during the past twenty years or so :)


It's already looking cleaner and tidier without those strips, I expect that I won't be replacing them after I repair the damage.


The building crew was here to extend the height of the wall a bit. It should help to keep the Marigold Project and the project workers dust-free, dry and better protected from whatever Mother Nature can chuck at us.


Once the plaster has dried I can give it a lick of paint and it should look like it always should have.  Now I need to get 5 more roofing sheets and finish the covering over the top. Thanks to Dino once more for all the help.


Thanks for stopping by
CooP

Friday, 3 May 2013

Cleaning Up A Bit

Once you have heard the lark, known the swish of feet through hill-top grass and smelt the earth made ready for the seed, you are never again going to be fully happy about the cities and towns that man carries like a crippling weight upon his back.
Gwyn Thomas

I scraped off a lot of congealed muck from the protective bash-plate which was mounted beneath the gearbox. I gave it all a good going over with a wire brush to remove the worst of the rust and then slapped on a coat of rust-converter liquid with an old paintbrush.


It looks rather good today, seen here with the  mounting U-bolts that I bought a while back. It's not perfect but with a good coat of primer and a couple of finishing coats of paint it'll be dandy. At least the rust is gone.


I also had a go at tidying up some of the scruffy bodywork and sheet metal today. The back end was gummed up with rotten old stickers, most of which are not even relevant any longer. My kids did a mad turn with some leftover tins of enamel paint a few years ago when we took Marigold to a 3-day music festival on her final trip as a standard Westy. 


I attacked them with a wire brush and a sanding disc attached to an electric drill. Got some reasonable results but will still have to sandpaper, prime and prepare before even thinking about the top coat. This is where I am at the moment, still have some wicked holes in the engine lid to be filled. The authorities keep changing the registration number-plate requirements so we have a good pattern of holes to remove.


The steel floor on the driver's side (now the right-hand side!) is badly rusted and pitted, right through in parts. Oh dear. I gave it a good few strokes with the wire brush and laid a couple of coats of rust converter down on it. 


It's still looking pretty grim but at least I should have arrested the rust a little. I have picked up some glass-fibre matting and 2-part resin to fix these holes. I just don't have the welding skills to weld in a replacement metal part to this thin substrate, although I may rivet one in to add strength before I "glass it".


Thanks for stopping by
CooP

Thursday, 25 April 2013

Getting Into Gear

Climb up on some hill at sunrise. Everybody needs perspective once in a while, and you'll find it there.
Robb Sagendorph

I've been fiddling and struggling with the new gear linkages for weeks now, on and off. It's been a faff getting the gears to operate fully without the ball of the base of the gearstick popping out of the cup/socket that it's meant to seat within. Here's a pic of the guide plate that is meant to assist with lining this all up (oval plate at bottom of picture).

The gearstick passes through the squarish hole in the centre of this plate. The raised section at the right of the centre hole is intended to restrict you from shifting accidentally into reverse. By deliberately pressing down firmly on the gearstick you can then manipulate the stick past this point and into reverse gear.

Examination of the diagrammes in my various user service manuals seem to show that this plate should have a second raised section on the other side. With the aid of the ever-helpful Dino we managed to make and weld on a similar raised bit so that it looks like the one in the diagramme.


Hard to believe but this simple fix has made all the difference! Wahey! Now all of the gears are easily selected, and exactly where they should be. It's not popping out of the socket and it all feels pretty smooth too. What a relief! Thanks again Dino.

Next challenges are the cable and hydraulic linkages for the brakes, clutch, handbrake, accelerator and electrical components. No problem!

Here's a bonus pic - I went to help Marius last night to get "Flossie" bump-started after a long rest. What a great motivator for me to be able to ride around the suburbs in this lovely old bus.


Thanks for stopping by
CooP
Related Posts Plugin for WordPress, Blogger...