Tuesday 30 October 2018

A day at the links

Travel like Ghandi, with simple clothes, open eyes and an uncluttered mind.
Rick Steves

After a lot of struggling with the adjustment of the gear lever it occurred to me that the problem could lie elsewhere in the long line of links that make up the gear shift assembly. So I stuck my head under the project to have a good nolly at it:


Aargh, that's just horrid! After finding parts of the linkage lodged in various other parts of the underside, and other parts missing, I realised that we are simply going to need replacements. Luckily my local spares shop could order some for me 

Here's the old, what's left of it, looking pretty grim:


Here's the new part about to go in:


And it all went rather smoothly (for a change!). All fitted and wired up nicely. The gear selector now works smoothly and with a reasonable amount of accuracy - it's still a 47 year old Kombi after all!


Thanks for swinging, see ya soon for the next update,
CooP

Thursday 27 September 2018

Just add fuel

I am one of those who never knows the direction of my journey until I have almost arrived.
Anna Louise Strong

So, in my previous post we got the fuel tank cleaned and sorted. Now we need to fit it and test it.

We already fitted the engine so that we could do a test run with clean fuel and fuel hoses. It's not quite right as the vacuum advance for the timing is not working and the engine won't rev up properly under load. I'll organise some new parts for that during the week.

Of course, the fuel tank cannot be fitted without removing the engine...yet again. It was a real fiddle but we managed to squeeze in the tank after dropping the engine to the floor.


Not a comfortable way to work but the job's a good 'un.


 I have replaced the fuel pipes and the connectors on the hollow steel breather pipes. All refitted and ready for testing.

A little bit of hassle to sort out the timing and I can fit the new distributor that I bought. It was only slightly more expensive to buy a whole distributor than to buy the vacuum advance unit!


That set the scene for a load of fiddling and head-scratching. The engine simply wouldn't start again. It was cranking okay, the sparks were there, the newly overhauled fuel system was doing its thing...but no life. Sigh. We replaced the old points, the old condensor, and eventually the entire old distributor. Still nothing. Hmmmm.

Eventually we realised the engine might be cranking a little slowly so we connected up some jumper cables from the trusty old diesel bakkie and - shazam! - like magic she fired up and ran perfectly. Whew what a waste of time lol. Lesson learned and we'll keep the battery well charged from now on.

It's been a long night but the engine and fuel system seem to be sorted, for now anyway.

Thank you for the visit, see ya next time,
CooP

Friday 14 September 2018

Tanks for the memories

It always seems impossible until it’s done.
Nelson Mandela

We have been struggling for a long long time to get the rebuilt engine set up properly. It wouldn't idle right, then it wouldn't pull properly, then it kept stalling out...extremely frustrating. Eventually it went back to the engine builder for him to double-check everything.

After extensive checking and testing, the only oddity seemed to be that the valves were gunked up with some sort of crud. A good clean and rinse was sufficient to get the engine running smoothly and with apparent good power output. But the builder says to check the fuel in the tank, it's probably contaminated with something 'orrid.

Welcome back :)
So we drained the fuel tank into a few containers - it resembles muddy water, oh crap! That's forty litres of expensive fuel that will have to be disposed of, buggerit. I have removed the tank previously to give it a good clean but it looks as if it should come out again for a rinse.

Looks okay on the outside...

...but there's a swamp inside :(

So I asked around on the old interweb thingy for some help with proper cleaning and possibly lining or coating the inside of the tank if necessary. And Silverton Radiators in Strydom Park were recommended. I blagged a ride from a family member with a working car (thanks Keegan) and popped over to have a look.

Not only were they willing and able, they were also speedy and very reasonable on the pricing. Less than 24 hours after dropping off the sludgy tank it was ready for collection.


They have given it some kind of acid bath and chemically cleaned it, inside and out. The exterior has been re-painted with a protective coating while the interior is mud-free and shiny. A rust preventing liquid has been sloshed around inside to finish it off and it looks properly lovely - good result!

Next we can refit the tank, refit the engine and perhaps get this project mobile at last.

Thanks for keeping up, come again soon for the next episode :)
CooP

Sunday 2 September 2018

Recovering

Some people never go crazy. What truly horrible lives they must lead.
Charles Bukowski

I know that I'm looking forward a long way here--all the way to the interior finishing touches--but I spotted some interesting fabric at the local habby and I just had to get some.


Surprise! When I got to the register I was told that this material was on a special offer - half price. Brilliant :) It'll go well with the existing orange and grey scheme that I've planned.

The original Westfalia plaid cushion covers are in a sad and sorry state. They are dark blue and never did fit with the old burnt orange paint scheme of the original camper. No idea who designed the  scheme back in 1972, but it's high time for a change of colour.


Faded, stained, worn and old. The foam is not going to survive either I fear, I'll be looking to replace it too.

I am, as usual, going to try to do the job myself - I reckon I should have this covered, haha.

The staples holding the fabric in place are badly rusted, right down into the wooden base. It's taken most of an afternoon and evening but I have managed to dig 'em out. Lots have snapped and mangled and I spent ages picking out little rusty, spiky bits from their forty-four year homes in the wood.


Are we helping?

I was right about the foam - it's crumbly, crusty and a little manky. I need to find a source of good quality foam for the padding and then I can get cracking with the re-upholstery.

Thank you for coming by, see ya soon,
CooP

Tuesday 21 August 2018

The no-light skylights

It is better to fail in originality than to succeed in imitation.
Herman Melville

My skylights in the Dormobile pop-top have been missing for ages. My Dad busted one off thirty-odd years ago by crashing it into a low-hanging fire extinguisher nozzle in a mall parking lot. I lost the other one on the motorway fifteen years ago on the way to a music festival in Heidelberg. I'd forgotten to close it properly. Sigh.

Since then I have used various odd plastic items such as Tupperware-type food containers and tea trays. I have been struggling to find an affordable substitute for the real thing, which is over three grand to import a pair of originals with the correct seals and fittings, gulp. The "proper" ones look like those in the pic below:

They are designed with an adjustable hinged tilting bracket that can open them and lock them in any stage between fully open and shut.

Here's a pic of my new substitute skylights:


If you think that they resemble catering dishes then you'd be right - that's exactly what they were designed for. The newspaper is my cutout template of the hole which I used as a sample. They are a perfect fit for the vacant spaces in the fibre-glass roof, placed here on a red wooden table:


Yeah yeah it's not ideal, I know, but the "proper" ones arrive from abroad with the respective seals and fittings for over R3000 for the pair. These are under R400 for the two, with another R150 for some nice screws and glues. So, on my budget that will have to be good enough.


So that's it for another step in the project, I am properly delighted to have found these at last. They are waterproof, weatherproof and should last for a very long time without much maintenance - proper result!


Thank you for reading, pop in again soon,
CooP

Saturday 21 July 2018

Missing the point

Go confidently in the direction of your dreams. Live the life you've imagined.
Henry David Thoreau

I have long been distracted by the doubled-up and anachronistic jack points under the centre of this Kombi. They are an eyesore and they simply have to go. They were part of the whole joining-up process where I cut the two donor buses alongside the reinforced areas on their circumferences and then joined the two halves by welding those areas of strength together.


I got the angle grinder out and hacked 'em off - simples! Unfortunately this left a rectangular hole in the underside of the reinforced crossmember under the bus. Two square panels cut from scrap and neatly MiG welded in by the friendly neighbour and the job's done.


Isn't that lovely? Small job but it's a big improvement to my eye :)


Thanks for the visit, come back soon,
CooP

When you need body

I am thankful to all who said no to me. It is because of them that I’m doing it myself.
Albert Einstein
I reported back in January that I had found a fit young helper who was as keen as mustard to work on the project. Sadly he was far too bright and ambitious to remain available for long - he has started his own small printing business and is pretty tied up with it full-time. Good luck Patton.

This means that the ongoing bodywork for the project has taken a virtual back seat, and I have focussed on other minor tasks in the interim. But the body is rusting away faster than it's being fixed, so I simply must get on with it.

I got myself some fresh body-filler, loads of sandpaper and sanding discs. Oh and a new rotary sander, powered by compressed air - flippin' awesome!

Following advice from someone far wiser than I, I am going to try to complete one panel or section at a time, before moving on to the next bit, Starting at the back, let's see how that goes...


There are loads of flimsy bits, some of which were previously drilled for reflectors and other ornaments, some of which has just rusted away gently by itself.


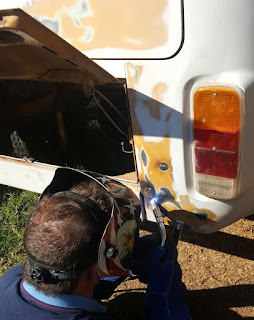
The new MiG welder is roped in to fill the blanks and then I'll cake on a bit of the new body filler to test it out.


Thank you for visiting, pop in again soon,
CooP
Related Posts Plugin for WordPress, Blogger...