Saturday 13 December 2014

Re-tyred

There are no words that can tell the hidden spirit of the wilderness, that can reveal its mystery, its melancholy, and its charm.
Theodore Roosevelt
Not much going on at the moment. I'm doing a little work on the various remaining dents and scratches and saving up the spare change for the major work that remains to be done. I did manage to release some funds for some new tyres, nothing fancy, some CV2000s, fitted and balanced beautifully by Hi-Q in Ontdekkers Road.


We'll sort out the minor electrical issues and hopefully get the old girl running again early next year.

Thanks for the visit, come again soon!
CooP

Sunday 7 September 2014

Primed mover

Go confidently in the direction of your dreams. Live the life you've imagined.
Henry David Thoreau
So the yellow primer ran out half way through the completed job and the moronic "suppliers" couldn't supply any more, despite two of their branches claiming telephonically to have some in stock. The main reason for rushing through this priming job was to make the project look reasonably presentable for the big move to my current, shared dwelling. Aargh well, I managed to find a good ms primer product at The Toolman in Krugersdorp, together with some solid advice and friendly service. Unfortunately it's grey, on the other hand it seems to be a better product that covers more easily and is a pleasure to spray on.


The roof and the pretty backside were coated in the grey while the sides that were already done with the yellow primer were left just so. Time is of the essence at the moment as we have to move soon.


If I could start again then I would have done the whole thing in the better quality grey primer. No matter, although she looks a little odd in her new two-tone suit she still is starting to look a bit smart. The steel wheels are a temporary fitting and will be replaced by the correct originals when they have been cleaned up nicely and fitted with some new bootees.

And so the day of the big move arrived and there is no more time for minor details. When I washed the bus before painting I was a bit over enthusiastic with the water hose and managed to soak the dashboard quite well through the gap left by the missing windscreen. This has created a couple of short-circuits in the wiring causing some lights to work when they shouldn't and other things to fail when they should be working. Rather than risk any real damage we chose to disconnect the battery and abandon the idea of a self-propelled move to the new residence.

Unfortunately the move itself, under tow, was a bit too busy to worry about photographs. It was accomplished fairly late at night under cover of darkness and on streets that were ghostly quiet. It was a great thrill to be behind the wheel and under some minor form of control, I can't wait to do a proper test drive.


It was an uneventful move, my ever-friendly neighbour was calm, patient and sensible as usual and we now have the project neatly slipped into place outside my wee rented room. Now I can do a bit of work occasionally without having to leave home :)

Thanks for popping over, come again soon!
CooP

Sunday 17 August 2014

Prepping and Priming

Happy are those who dream dreams and are willing to pay the price to make them come true. ~ Anonymous
The past fortnight has been two weeks of muscle-sapping effort in all of my available free time. The old paint has been flatted down with 150 grit sandpaper, all over. All of the loose rust has been wire-brushed and treated with rust converting goop. As always you can enlarge the pics by clicking on them. Or not, whatever works for you ;)

I spent another four hours washing, scrubbing and rinsing the entire bus to get it ready for the next step.


Masking and taping off the windows and door handles took another two evenings of patient but frustrating work. As I've discovered with most of the tasks in this project, it's not as easy as it looks.


Eventually, after months of anticipation, we can start throwing some primer at the project. After a quick wipe-down with with a rag dipped in thinners we could start at the front, windscreen surround and the foremost part of the roof. We started off using a smaller spray-gun for the detail work around the 'screen area and then moved to a bigger one for the more open, flatter areas.


We made it as far as the driver's door before the exhaustion started to wear us out. It was after 11pm and time to give it a rest. Over all it looks pretty good. The coverage is fairly neat but it's tricky to get a nice, clean layer of paint laid down and it's not perfect. The nice new layer of clean paint also seems to really highlight every little blemish and imperfection in the bodywork. On the plus side the paint seems to be going on well and the careful preparation seems to have been worthwhile.

Next session we'll continue with the priming, lot's of hard work left to do still but excitement levels are high!

Thanks for the visit, come again soon!
CooP

Sunday 10 August 2014

Noise and Dust

All I want is to stand in a field and to smell green, to taste air, to feel the earth want me, without all this concrete hating me.
Phillip Pulfrey

The only progress that I seem to be making lately is in the joint irritations of excessive noise and too much dust. I have been generating loads and loads of both. Thankfully the neighbours of my neighbour seem to be a pretty tolerant bunch. I wish that my own constitution could stand it better though, I coughed less than this back in my chain smoking days. And the ringing in my ears - don't ask 'cos I can't hear you properly.


I have started filling the horrible dented frontal area above the windscreen. I had planned to complete the remainder of the filling only after giving the whole bus a coat of primer, but this section I'd like to finish off as I want to get the windscreen back in as soon as poss. It has been flatted down in an approximate sort of way and won't be perfect before the primer coat, but it's a start anyway. I can go over the project at leisure after the primer coat has been chucked on.

The whole of the old girl's paintwork has been completely sandpapered with 150 and 180 grit paper. It's been an exhausting two weeks but the end is in sight at last. I have flatted down most of the existing paint and treated much of the rusted area with a magical rust-conversion muti to prepare it for the primer coat. 


I have only a couple of weeks remaining before the project must vacate the current premises and be moved to the small car-port outside my little rented room. As long as I have a fairly tidy, even coat of primer thrown on then I am hoping for my landlady to be tolerant of the presence of the big bus. After that then I can focus on the remainder of the bodywork and then the finishing coats of paint.

So...progress is being made, fairly surely although seemingly rather slowly. The preparation of the old paint has taken longer that I had expected and been physically far more effort that I imagined. But it's almost ready for a protective primer coat in the next week or two.


Thanks for popping over, come back soon! We'll be throwing some paint at it soon.
CooP

Saturday 5 July 2014

Turnkey Operation

Happy are those who dream dreams and are willing to pay the price to make them come true.
Anonymous


We're running again!


We're putting the new wiring harness to a proper test and actually starting and running the engine using the "proper" tool - the key! So the battery needed a boost from the jumper leads but she starts and runs. These are certainly exciting times, what a rush!

Thanks for the visit, come back soon! Prepping for paint next.
CooP

Tuesday 1 July 2014

Time to Dash Off

Go confidently in the direction of your dreams. Live the life you've imagined.Henry David Thoreau

We're getting on with body work and preparation for paint now that the bulk of the wiring has been completed. I've whipped out the dashboard panel and the attached, vinyl padded plasticky bit so that I can paint and polish them separately from the bus. Lots of dust and crap under there but now is a good chance to clean it up properly and double-check our wiring and electrical connections.

Pictured above is a bolted-in plate ahead of the steering column, the existing version of which is slightly bent from the front-end bump that this bus has suffered. I have replaced this with the original Marigold one from the orange bus. Despite being from a left-hand-drive bus these parts appear to be identical and interchangeable. As with many of these Kombi parts - they were designed to be used in different parts of the World with the minimum of fuss, too clevah.


The surrounding rim of the windscreen is badly rusted and consequently pitted with occasionally holes going right through the thin sheet metal. We set up some little bits of backing plate made from old angle-iron and filled the holes in with weld. After grinding down the protruding welds I then mixed up some fibre-glass resin and spread a good, thick layer over the entire bottom section of the surround. I'll have a wee look on Saturday and see how it sets. I'm hoping that it'll serve the dual purpose of smoothing out the pitting and sealing out any water in future.

Thanks for the visit, come again!
CooP

Thursday 19 June 2014

Let There Be Light

All I want is to stand in a field and to smell green, to taste air, to feel the earth want me, without all this concrete hating me.
Phillip Pulfrey

We've had  a long struggle to sort out the dusty, dirty, burned mess that was the wiring harness. We finally got to slap in a battery and start testing. With a fire extinguisher at the ready we cautiously started working our way through the lighting systems. Click the pic for a bigger version. Or don't, your choice.


To my faint amazement it all seems to be working!

The headlight and indicator relays attached to the underside of the fuse box were rusted through and completely unusable. I managed to source replacements locally, although the indicator relays from the nearest parts shop turned out to be repeatedly duff and failed to work at all. After returning three times for replacements I ended up demanding a refund which I then spent at Krugersdorp getting a suitable (and working) replacement. Exciting times, it's good to see the various bits coming to life again.


We had some rather dodgy connections in the rear light clusters and most of the lights did not initially work at all. They are now stripped and all of the copper contacts have been gently sandpapered back to shiny beauty. I'll leave the clusters out for now so that we can start prepping the surrounds for the imminent painting.

I still need an indicator switch. Nothing yet from the various feelers that I've put out, I may have to import a new one or simply stick an ordinary toggle switch on the dashboard for the time being. But we have shorted out the wires and the indicators are all working just fine.

Over-all the new wiring loom seems to be a great success, the ignition switch works, the starter turns over the engine, the lights all seem ok and the dashboard gauges and lights all seems to be doing what they should. Powaaaaaaahhh!

Thanks for visiting, see ya soon!
CooP

Saturday 24 May 2014

A Bit on the Side

Life is like riding a bicycle - in order to keep your balance, you must keep moving.
Albert Einstein

So I eventually got around to tidying up the mess on the sliding door. It's not quite finished yet but I made a lot of progress today.


It's a helluva lot of hard work sandpapering this polyester body filler! It really gets hard and it takes time and care to get it to flow and blend with the curves and turns of the door. I was about half-way finished when I stopped for a needed breath of air and I took the snap. I had a go with the polisher shown in the pic, after I had added a sanding disc to it. Even at it's lowest speed it was still a bit aggressive so I packed it away and finished off by hand. It 'aint perfect but I like it.


With a brush I walloped on some of the fancy 2K primer that I bought some while ago. It seems to work ok but I'll spray it next time for a smoother, neater finish. This will require more sanding to get it right but it has covered the worst of the damage, which was my real concern.


Thanks for the visit, sight ya!
CooP

Saturday 17 May 2014

Going Topless

For every person who has ever lived there has come, at last, a spring he will never see. Glory then in the springs that are yours.
Pam Brown

Wheeeee! We managed to get the fourth and final coat applied to the pop-top roof. It's looking pretty gawjus, people. Interesting texture, I rather do like it. I bet that the rubbery matte finish attracts dirt like a 5-year-old in a swamp. But it should flex and stretch with the movement of the roof and not crack and split like the old paint had done. And for only forty bucks per litre I can easily afford to touch it up regularly if I have to.


Click this pic for the bigger picture, if ya like.

More soon, thanks for visiting!
CooP

Friday 25 April 2014

Flipping My Lid

I love deadlines. I love the whooshing noise they make as they go by.
Douglas Adams
Sometime before Marigold left Germany in the early seventies she was fitted with a side-lifting Dormobile "pop top" roof. This allows fantastic headroom and also allows room for the fitment of two stretchers, quite suitable for kids although a tight squeeze for most grown ups. My younger sis and I spent almost every holiday night in our youth sleeping on these stretchers.

As always, you can click on the pics for a larger version. Or not. Hey man it's your choice.


The combined ravages of time, neglect and the harsh South African climate have had their effect on this fibre-glass masterpiece and it is showing some wicked wear and tear. One of the translucent pop-up skylights was destroyed loudly and violently against a low concrete beam in an underground car park. The other departed suddenly and with a loud BANG at full speed (Speed? Lol, poetic licence) on the road to Heidelberg Kloof some years ago on the way to the local version of the Woodstock music festival. This caused some interesting and exciting swerving and fist-waving in the long line of already impatient traffic behind us, and startled my pre-teen daughter into wide-eyed rigidity. Ah, happy memories - yet another item on my wishlist.


I can get replica replacements for these on a Brit website for some nasty high price (36 quid each plus postage, *gulp*, that's nearly 15 gazillion rands with the current exchange rate).  but I have decided to either find a similar and locally-available substitute or to replace them with fixed windows. Maybe one from a caravan or summat. A friend on one of the local air-cooled forums has suggested a bain-marie dish so we have lots of possibilities. I'll be on the hunt over the next couple of weeks for something suitable.


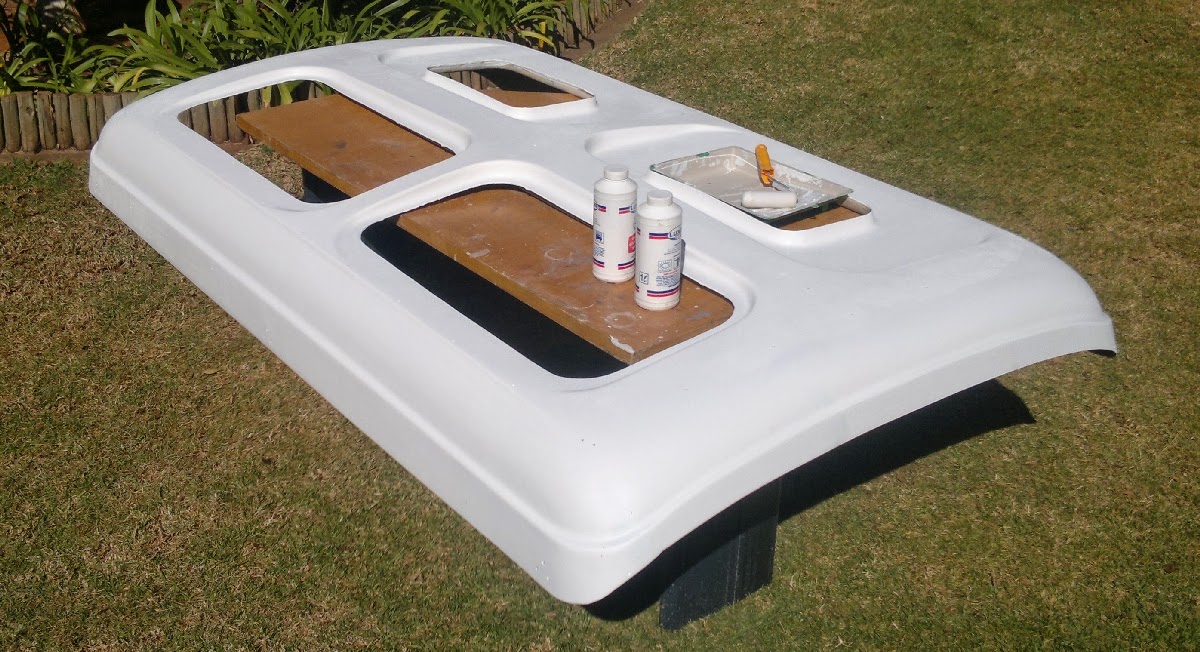
The window rubbers were rotten and brittle so we pulled them out and removed the windows for cleaning. While at it we decided to do a proper job and remove all of the other fixtures and fittings too. We started sanding down the fibre glass surface to prepare it for paint, partly with an electric sander and partly with sanding blocks where the electric proved to be a bit too aggro. What a way to take off the autumn chill. Blood, sweat and tears: not just a bad singing group for nostalgic parents.


I grabbed hold of some modern inertia-reel type safety belts for the project. I don't like to buy second-hand for safety-related stuff so I bought brand new ones. The originals were well worn and didn't look very safe. Nor even very belt-like, come to think of it, more like giant, grey, furry caterpillars breeding in the seats. We made up some extra-heavy steel brackets to support them and they'll be fitted correctly once we applied some proper paint.

Sorry for all the rubbishy pics, I keep forgetting the better camera at home and end up using my old phone to take the shots for the project diary. Just live with it and use some imagination. Or bring some beer and come and see it for yourself.


Thanks for visiting, do come again!
CooP

Sunday 6 April 2014

Bay Window Blues

When you stop doing things for fun you might as well be dead.
Ernest Hemingway, True at First Light

This model type of the VW Kombi was known to many as the Bay Window. This is because the large, curved front windscreen was such a noticeable change from the twin, flat windscreens of the previous "split-screen" models. The windscreen has not weathered well and was particularly affected by the fire that caused so much other damage to the front end of the white donor bus. (As usual, click on the pics to enlarge them a bit.)


The screen was cracked at the bottom right, and the glue within the laminated glass had boiled and bubbled and turned a blueish brown colour. I removed the pristine screen from Marigold before I gave away the leftover sections of the project and it's been carefully and lovingly stored away. So I do have a replacement and will just need to get a new seal and some assistance with fitting, when I'm eventually ready.

I cut around the rubber seal and popped out the old glass with little effort. As I expected the steel surround is badly rusted and pitted, there are a couple of holes that go right through and much of the rest is thin and useless. This is a fairly common problem with these old Kombis, the design of the surround makes it a water trap and the rust is almost unavoidable without taking special precautions.


I have been scratching, scraping and scrubbing at the side windows to remove all traces of many souvenir stickers and transfers that once graced the old girl and boasted of her successful travels and conquests. They were, in most cases, faded and peeling and looking rather tatty so they had to go. I'll start a new collection of my own when I hit the road!


Thanks for visiting, come again!
CooP

Thursday 27 March 2014

Plodding Along

One is almost always a slave who cannot live on little.
Horace
I'm not getting a lot finished in the main project but I am using my spare time to continue working my way down the list of loose ends. Lots of the little items that need cleaning and painting are being cleaned and painted.


Dashboard vents, bumper brackets, towbar etc are all being carefully sanded, wire-brushed, primed and painted. I am also working on some of the camping equipment - gas bottles, cookers, tool-boxes, folding chairs all need to be taken down, dusted off and tidied up.


Unfortunately I discovered that my secure storage room had sprung a small leak in the roof. Most of things that I have put away for safety have been rained on regularly for the past few weeks, oh crap!

Luckily the mildew and the mould had not completely taken over. I laid it all out on the grass during a gap in the weather and most of it is still perfectly serviceable. The now-dried mould came off with a wire brush and the canvasses have been carefully repacked and placed back on the now-dry shelves. The sleeping bag, Marigold's curtains and a few other bits are sadly beyond use and have been tossed out. Lots of rusty nuts and bolts will probably be easier to replace than to try and restore. A pity but there you go, onward and upward. The leaky roof has been repaired so we should be warm and dry from now on.


Thanks for stopping by
CooP

Sunday 16 March 2014

Nice Pair of Hooters!

Today is only one day in all the days that will ever be. But what will happen in all the other days that ever come can depend on what you do today.
Ernest Hemingway

It's amazing how your mind can wander when you are browsing around an auto-spares supermarket. When I asked the young lady to show me her hooters she barely blinked. I explained that I was looking for a nice pair, not too big and on the cheaper side of the market. She started frowning and looking towards the security guard when I asked her opinion on size and shape. She sidled away before I could get her view on whether anything larger than a handful is a waste. So, as usual, I grabbed the cheapest pair and headed for the checkout.


Am I the only one that finds this funny? Or am I turning into that creepy old man that our teachers used to warn us about?


I've cleared most of the crammed-in crap spares and equipment from the interior of the project and thrown it away/cleaned it/stored it/hidden it as applicable. Roof-racks, bumpers, a complete dashboard, ventilation systems, chairs, tables, stools, cushions, cooking equipment, gas bottles . . . Much of it will be re-fitted inside Marigold, a lot of it consists of duplicated parts that I shall probably sell, trade, gift or dump after the main project is complete. Click on the pics to enlarge 'em, go on.


I scraped most of the souvenir stickers from the right-rear window, the left-rear shall be attacked with a scraper-blade on Wednesday. I also removed the two side windows, the ones immediately behind the cab doors. The rubber seals on both were badly perished and cracked. They will need to be replaced with new ones.


My ever-friendly neighbour has invested in a new toy - a pressure washer that is remarkably powerful; for it's diminutive size it packs quite a watery punch. He made short work of removing the collected dirt, mud, insect nests and small garden of live moss (really!) stopping up the sliders. They slide back and forth just lovely now. The water jet even managed to put a little shine back onto the worn and weathered aluminium frames, thanks mate!

More soon, we've still got the last of the wiring loom to solder up (in? on? together?), should be able to make some progress later this week.

Thanks for stopping by
CooP

Sunday 9 March 2014

Cleaner Air

And the day came when the risk to remain tight in a bud was more painful than the risk it took to blossom.
Anais Nin


I didn't get much work done this week; my friendly neighbour and I were busy working on one of HIS projects for a change. We are supposed to alternate on Wednesdays but my projects have been hogging the labour force lately so I can't complain. I have used some of my spare time to tidy up the oil-bath air filter. As usual you can click on the pics to enlarge them slightly.


In a previous post (Click here to view) I gave this device a mini-service by making new rubber O-rings and refreshing the oil. But it still looked a bit shabby to me so I sanded down the worst of the old paint and gave it a couple of coats of new.


I couldn't bash out all of the many dents because of the double-walled design of the main cylinder. But it certainly does look better to my little eye. Another job has been jobbed and we are one more step closer to the end. Next week I hope to finish the joining together of the main wiring harness.


Thanks for stopping by
CooP

Thursday 27 February 2014

Spaghetti Junction

There are no words that can tell the hidden spirit of the wilderness, that can reveal its mystery, its melancholy, and its charm.
Theodore Roosevelt
We managed to get some of the new wiring spliced in, soldered and sealed last night.


It helps to have prehensile toes! The rear section has been matched up, labelled and soldered. We have wrapped up the individual joints with a sleeve of shrink-wrap, then the whole lot has been sleeved with a larger piece of shrink-wrap. This lot has been bound with a bit of insulation tape, then the whole lot has been bunged into a plastic conduit. Finally that conduit has been stuffed inside the hollow chassis rail.


Should be fairly well protected I reckon! That's the rear end finished, next week we'll do the front section joins.


In my spare time I have been tidying up a few loose parts, mostly plastic and rubber bits. I love rubber bits. They looked pretty rough to start with but a simple scrub with some soapy water already got them looking a bit nicer. Pictured are air vents, step rubbers, mirror, door handles and cubby door.


A lot of polishing and buffing with regular shoe polish and they all look like new! Loads of elbow grease but it's all worth while and these bits will look luvverly when I refit them.


Thanks for stopping by
CooP

Wednesday 12 February 2014

Staying On Course

There are far, far better things ahead than any we leave behind.
C.S. Lewis
In our attempts to remove the old and useless ignition switch we also managed to damage the steering wheel quite badly. It'll still work but it looked a bit naff so I took it home for a bit of extra tlc.


The Plastic was a bit old and brittle and a couple of larger chunks had been dislodged, although the main metal frame is still strong and undamaged.


I filled it with a two-part epoxy putty and gave it a few hours to set. I filed it and sanded it until it resembled the original a little more. Re-fill the holes and low spots and sand it down again. Repeat a final time to fill in the blemishes caused by my own drunken careless file work. It's very much similar to the earlier work that I have done filling dents in body panels, but this putty sets really, really hard!


I sanded down the entire wheel after I had tidied the putty work. This to give it a bit of a key for the paint, which I applied from a rattle-can. Eight coats on the centre hub but just two on the outer ring 'cos I want to bind that with leather strips.


A few unfortunate slips with the rasp means that I left a couple of wee blemishes in the final finish but . . . so what? It looks pretty good to my weary eye and I have more important jobs to get on with right now. It looks okay fitted back in it's place and I think that I can learn to live with it as it is :)


Thanks for stopping by
CooP

Thursday 6 February 2014

Vague Steering

None are more hopelessly enslaved than those who falsely believe they are free.
Johann Wolfgang von Goethe


We are continuing the slow slog down the long list of loose ends and trying to tick off a couple or three each month. We have stripped and removed the steering mechanisms from both donor buses and will attempt to assemble a best-of-the-best setup from the selection of parts.


These are some of the steering bits, parked on my spare desk for now, a reminder of the work I need to do in my spare time this week. It's in pretty good nick, just needs cleaning and maybe a lick of paint and we'll be able to replace it next week.


We also managed to do some more work on the re-routing of the new wiring underneath the bus. We are using a combination of regular plastic conduit, plastic electrical sleeving, shrink-wrap and the natural chassis rails to route the new cables. Most of it is using existing holes and channels in the chassis, some of the newer holes are our own handiwork. Next week we can start the joining, soldering and wrapping.


Thanks for stopping by
CooP

Wednesday 22 January 2014

Must Dash

Everybody needs beauty as well as bread, places to play in and pray in, where nature may heal and give strength to body and soul.
John Muir


Marigold's original left-hand-drive dashboard was removed before the skeletal remains were dragged away and taken to places unknown. I do have a bit of a soft spot for the old dials and guages, having spent so many happy years of my childhood studying them on our regular holiday trips. So I have taken out the relevant clocks and dials and transferred them to the new, right-hand-drive dashboard. Makes my heart happy to see, it really does, like a familiar smiling face. As usual, click on the pics to enlarge 'em a bit.


I managed to locate some colour images of the wiring diagrammes (thanks to the nice people at The Samba for the help) and printed them out to use in trying to make some sense of the tangle of wiring beneath the project. I cut and slashed rather indiscriminately when I did the original Big Chop and did not really think ahead very far. At that time I expected to redo the entire wiring loom in the unseen future. As it happens the wires that exist have been well protected from weather and other agents. They are in excellent condition and I expect that I'll be able to safely re-use long sections of the original loom. Thankfully, despite some minor differences between the 1971 front and the 1972 rear, the wiring is very similar and the colours all seem to match up except one.


When I look at the front interior of the project I think that I must be a bit blinded by affection. Or beer maybe, it could be beer. I don't seem to notice the huge collection of mess until I take a photograph and realise just how awful it all still looks. Never mind, any progress is good progress and we are indeed getting something done every week or two. After seemingly endless fiddling and following all of the exact directions on various expert websites I simply cannot get the ignition switch removed. I only have a working key for the original ignition switch taken from the other front-end. So I'm going to just change the whole housing and move it across - it'll be simpler in the long run I s'pose.


I gave the housing a light sandpapering and a couple of coats of satin black from a rattle-can. Looks okay, now we just have to get the steering wheel loose and I can fit the whole thing. Next tasks: to complete the wiring, test it all and chuck in a battery. We're getting there!


Thanks for stopping by
CooP
Related Posts Plugin for WordPress, Blogger...